ProBuilder allows you to bring more complex objects into your Unity scene without requiring in-depth knowledge of modeling programs such as Blender or Cinema4D. By now ProBuilder is integrated into Unity and can also be used free of charge in the Community Edition. In todays article I want to show you how you can integrate ProBuilder into your project and start modeling.
ProBuilder is not installed on your project by default, but you can add it via Window - Packages - All. After that you will find a new menu entry under Tools - ProBuilder, from where you have access to the different functional areas. The ProBuilder Window can also be opened and integrated into your workspace from there.
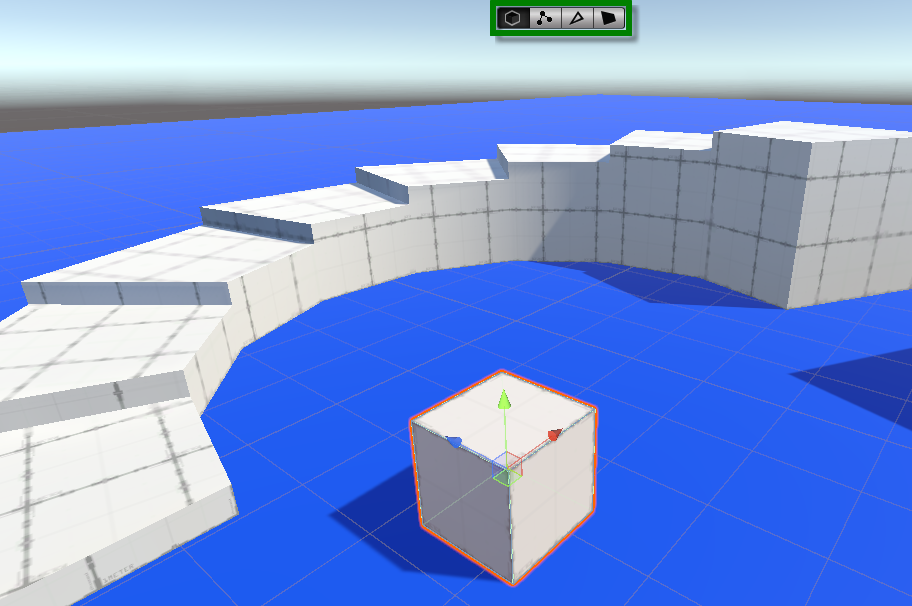
So much for setup, let’s get started with the practical part: CTRL + K creates a simple cube and places it inside your scene. With CTRL + SHIFT + K you can open a menu for creating more complex objects. This includes stairs, doors, pipes or arches with various configurable options. Of course you can also do all this from the ProBuilder window.
After you have brought an object, in my case a cube, into the scene and focused it, a selection menu (green marker) appears at the top of the Sceneview. You can use this menu to specify a selection mode, which includes object selection, vertex selection, edge selection and face selection. This allows you to manipulate the model in the selected way. Simply choose the appropriate criterion and then click for example a surface or a single vector to select it. You can also press and hold the SHIFT key to make multiple selections.
You can now manipulate the selected element. Therefore, you can use the regular editing tools you’re already familiar with: rotate, move and scale. Using these, you can modify the object as you like.
Of course, you can also define materials to your object. However, besides setting the materials for the whole object, you cann specify separate materials for each surface of the object. This is done via the usual drag and drop mechanism.
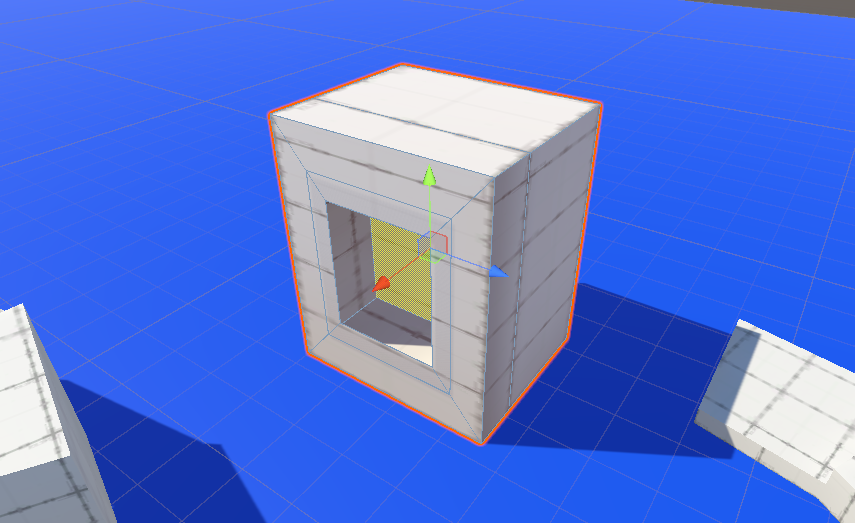
Another interesting feature is the movement of a selection in- or outside of an object by scaling it while holding the SHIFT-key pressed. Doing so, you can create structures like this one:
By now, you should have a basic idea of what can be done using ProBuilder. However, that’s by no means all the tool has to offer. ProBuilder adds a whole lot more of features that make modelling in Unity even easier and allow rapid prototyping directly inside the editor. For example, ProGrid is another feature that allows you to snap models into position right on the Unity grid.
If you’re interested in learning more about ProBuilder, I highly recommend checking out the teams documentation. Also, I found this Brackeys video very helpful to get started in that topic.